Winter’s retreat often reveals a lawn’s wear and tear, with unsightly brown spots and muddy patches revealing the harshness of the cold season. Nevertheless, do not worry, for with a touch of care and attention, your lawn can return to its pre-winter glory. Follow these simple yet effective steps to breathe new life into your grass and prepare for a summer filled with lush greenery.

Step 1: Damage Assessment
Begin by taking a stroll through your garden to carefully identify the troubled areas. Look for brown patches, compacted spots, or excessive mud – these all indicate that your lawn needs some TLC. Make a note of these areas so you can focus on repairing them later.
Step 2: Rake Away the Damage
Once your lawn is dry and free from frost, start raking away any dead grass, leaves or debris. This will help to loosen up the soil and encourage new growth. Be gentle when raking and avoid using too much force, as this may end up damaging the delicate roots of your grass.
Step 3: Aerate and Dethatch
Compacted soil can suffocate your lawn, making aeration an essential step in lawn care, as it helps oxygen, water and nutrients to reach the roots of the grass. Use a manual or powered aerator to create small holes in the soil, allowing for better air circulation. An aerator tool will help you perforate the soil, allowing air and water to penetrate deeply and rejuvenate roots. Aerating is particularly important for heavy clay soils or sections with high foot traffic. This will also help to loosen compacted soil and eliminate thatch – a layer of dead grass and debris that can prevent water and nutrients from reaching the roots.
Step 4: Clean Up
Using a sturdy rake, meticulously remove debris and thatch (dead grass) from the damaged sections. This step is crucial as it clears the space for new growth and improves soil contact for seeds or sod.
Step 5: Overseed or Resod Bare Spots
After aerating, it’s time to overseed or sod your lawn. Choose a quality grass seed (or sod) that is suitable for your climate and lawn type. It should be tailored to your lawn’s existing grass type and formulated for the sunlight exposure in the area. If you’re seeding, sprinkle evenly across bare spots and lightly rake them into the soil. If you have larger areas of damage, consider resodding instead. This involves laying down new pieces of grass sod over the damaged sections. If laying sod, be sure to place it snugly against existing grass for seamless integration. Water well and avoid walking on newly laid sod until it has rooted, usually within a month.
Step 6: Fertilize
As your lawn begins to recover, it’s essential to give it a boost of nutrients with a good quality fertilizer. Choose one that is specifically formulated for spring use, with a balanced ratio of nitrogen, phosphorus and potassium. This will help promote healthy growth and strong roots. A high-nitrogen fertilizer can accelerate growth and fortify your lawn against future damage, but it’s important to ensure you choose a product suitable for newly seeded or sodded lawns.
Step 7: Watering
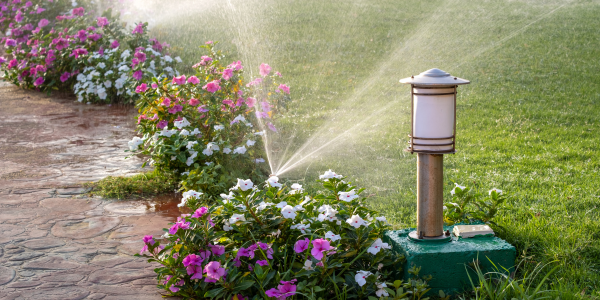
Proper watering is crucial for the success of your lawn revival. Water deeply, allowing time for the water to soak into the soil. This encourages deep root growth and helps your grass withstand drought conditions. Keep the soil consistently moist but avoid overwatering to prevent washouts or puddling. Water in the morning to allow for proper absorption and avoid evaporation during the hotter parts of the day.
Step 8: Restrict Traffic
Your newly repaired lawn is not ready for foot traffic just yet. Keep activities to a minimum for at least a few weeks to allow young grass blades to strengthen and establish roots. This will also give your lawn time to recover without any added stress.
Step 9: Watch and Tend
Finally, keep a watchful eye on your lawn’s recovery. You may need to tweak your watering schedule based on weather conditions or apply additional seed to thin areas.
Repairing your lawn is a perfect weekend project that sets the stage for months of outdoor enjoyment. With the right tools you’ll be well on your way to restoring your lawn to its former vitality.
Step 10: Regular Maintenance
Once your new grass has reached a height of about 3-4 inches, it’s time for its first mow. Keep your mower blades sharp to prevent tearing or damage to young grass. Taller grass provides better shade for the soil, reducing weed growth and minimizing evaporation. Continue to mow regularly, removing no more than a third of the grass height at a time, and remember to water deeply as needed. With proper maintenance, your lawn will continue to thrive and provide a beautiful green space for you and your family to enjoy.

Additional Tips
As winter fades away, follow these steps to repair your lawn and set it up for success in the upcoming warmer months. With a little effort and care, you’ll soon have a beautiful green space.
- Avoid using heavy equipment on your lawn, especially when it’s wet or newly seeded.
- Consider applying a pre-emergent herbicide in early spring to prevent weeds from sprouting.
- If you have pets, be sure to clean up their waste regularly to avoid damaging your newly repaired lawn.
- A thick layer of mulch around trees and shrubs can help prevent damage from heavy snow or ice.
Essential Tools for Lawn Repair
To ensure a smooth and efficient lawn repair process, having the right tools at your disposal can make all the difference. Here are some essential tools that you’ll need for a successful lawn repair project:
- A sturdy bow rake. This tool is perfect for raking away debris and loosening up compacted soil.
- An aerator available in manual or powered versions, this tool will help perforate the soil and improve air circulation, promoting soil health.
- A quality grass seed.
- Thatch rake to help remove dead grass.
- Protective garden gloves.
- Debris bags – reusable or compostable – to collect and dispose of debris.
- Watering can or hose with a sprinkle attachment: Essential for deep, even watering to nurture new seeds or sod.
- A wheelbarrow. For transporting soil, compost, or other materials that may be needed to fill in low spots or enrich the soil.
These tools and materials, combined with a bit of dedication and care, will set you on the path to a rejuvenated, vibrant lawn!
Not all grass seeds are created equal
The success of your lawn repair largely depends on choosing the right seed mix for your specific needs. Here’s why:
- Climate Compatibility: Seeds are formulated based on the climates they thrive in. For instance, cool-season grasses, like Kentucky bluegrass or tall fescue, prefer the chilly spring and fall of northern regions. Warm-season varieties, such as Bermuda or Zoysia grass, are tailored for the hot summers of the south.
- Shade vs. Sun: Some seeds are engineered to flourish in the shade, while others require full sun. Selecting a mix that aligns with the light exposure in your yard is crucial.
- Wear Tolerance: If your lawn sees a lot of foot traffic, opting for a hardier grass seed mix can help your lawn withstand the stress.
- Maintenance Level: Different grass types have varying needs in terms of water, mowing, and fertilization. Consider how much time and effort you’re willing to invest in lawn maintenance when choosing your seed.
Understanding these differences and selecting a seed mix that matches your lawn’s conditions can significantly enhance the success of your lawn repair project.
When selecting a grass seed mix, it’s essential to look beyond the basics of climate compatibility and traffic tolerance. A lesser-known fact is that many grass seed mixes contain a blend of both annual and perennial species. At first glance, incorporating annual grasses, which live for only a season, might seem counterintuitive. However, there are compelling reasons for their inclusion.
- Quick Cover: Annual grasses germinate and grow rapidly, providing a swift green cover that reduces soil erosion and keeps weeds at bay. This immediate coverage is particularly beneficial in repairing lawns with extensive damage or in establishing a new lawn quickly.
- Support for Perennials: While annuals provide immediate coverage, they also protect slower-germinating perennial seeds, giving them time to establish without competing with weeds. Once the annuals complete their lifecycle, the perennials will have gained enough strength to take over, leading to a dense and robust lawn.
- Cost-Effectiveness: Because annual grass seeds are often less expensive than their perennial counterparts, their inclusion in seed mixes can make a lawn repair project more affordable without sacrificing quality. This blend allows homeowners to achieve a beautiful lawn within a reasonable budget.
Understanding the strategic use of annual grasses in seed mixes shines a light on the nuanced approach to lawn repair and establishment. Their temporary nature serves an essential purpose in the lawn’s lifecycle, offering a bridge to a more permanent and thriving green space.
In Closing…
Reviving your lawn might seem like a daunting task at first glance, but with the right approach and tools, it transforms into a rewarding project that beautifies your home and enhances your outdoor living space. Remember, each step you take in lawn repair and care brings you closer to that lush, green oasis you envision. Should you find yourself in need of additional guidance or support on your quest to achieve the perfect lawn, don’t hesitate to visit our services page. We’re here to assist with everything from selecting the right seed mix to providing ongoing lawn care advice. Together, we can bring your lawn to life and keep it thriving season after season. Visit us today and see how we can help make your lawn the envy of the neighborhood!


