Estimated Reading Time: 7 minutes
When it comes time to choose the right thermostat for your home, it might seem like a simple task, but it’s one that can have a big impact on both your comfort and your wallet. Whether you’re sticking with a trusty old-school dial or diving into the world of smart home gadgets, this guide should help you approach the decision more informed.
HVAC 101 | Types of Thermostats | Wiring | Making the Right Choice | Installation & Troubleshooting | Final Thoughts
HVAC Systems 101: What’s Under the Hood?
Before you jump into upgrading your thermostat, you need to know what kind of HVAC system you have. Your thermostat is like the brain of the operation, while the rest of your HVAC system is the muscle, and they need to work together to keep your home comfortable.
A look into a few types of HVAC Systems:
- Single-Zone vs. Multi-Zone Systems:
- Single-Zone: One thermostat controls the temperature for the entire house, making it a straightforward option for smaller homes or those with consistent heating and cooling needs.
- Multi-Zone: Allows for different temperatures in different areas (or “zones”) of your home. This is ideal for larger homes or households where individual comfort preferences vary from room to room. Also common in multi-story homes where there are natural temperature differences between levels.
- Heating and Cooling Methods:
- Central Air Conditioning: Cools your home and needs to be paired with a separate heating system like a furnace. These systems usually share the same ductwork, with the thermostat controlling both functions.
- Furnace (Heating Only): Uses gas, oil, or electricity to heat the air, which is then distributed throughout the home via ducts. Your thermostat controls when the furnace kicks on based on the desired temperature.
- Heat Pumps: A versatile option that can both heat and cool your home. In the summer, it works like an air conditioner, and in the winter, it reverses the process to provide heat. A specialized thermostat is required to manage both functions efficiently.
- Electric Baseboard Heaters: Typically found in older homes or as supplemental heating, these units are controlled by individual thermostats in each room and provide heating only.
- Dual-Fuel Systems: Combines a heat pump with a furnace. The heat pump handles heating in mild weather, and the furnace takes over in colder temperatures. A dual-fuel system requires a thermostat that can switch between the two heating methods automatically for optimal efficiency.
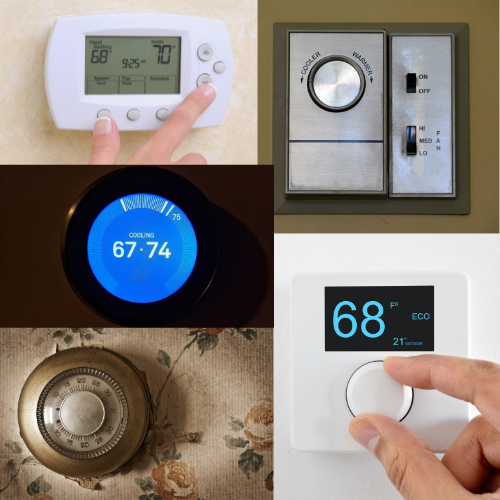
Types of Thermostats
Just like choosing between an Android or iPhone, your thermostat choice depends on your style and needs. Here’s a quick breakdown:
Traditional Thermostats:
- Mechanical (Analog) Thermostats:
- Oldie but Goodie: These are the granddads of thermostats—simple dials or levers that you adjust manually.
- Pros and Cons: They’re durable and easy to use, but as you’d expect, don’t offer any fancy scheduling features.
- Non-Programmable Digital Thermostats:
- Modern Basics: Digital screens help deliver more precise temperature control, but you still need to adjust it by hand every time you want a change.
- Pros and Cons: They provide better accuracy and precision, but like their analog counterparts, lack smart features.
Programmable Thermostats:
- Basic Programmable Models:
- Set It and (Mostly) Forget It: These let you create a schedule, so you’re not constantly fiddling with the temperature. Set it to cool down before bed, warm up before you wake— and so on.
- Pros and Cons: Great for saving energy, but they’re only as smart as the person programming them. Meaning, thoughtful decision making when it comes to setting schedules is a must to get the most benefit.
- Advanced Programmable Models:
- More Brains, More Benefits: These models give you more control, with options for different schedules and overrides for when plans change.
- Pros and Cons: More flexibility means more settings to understand and manage, but the payoff in energy savings and comfort can be worth it.
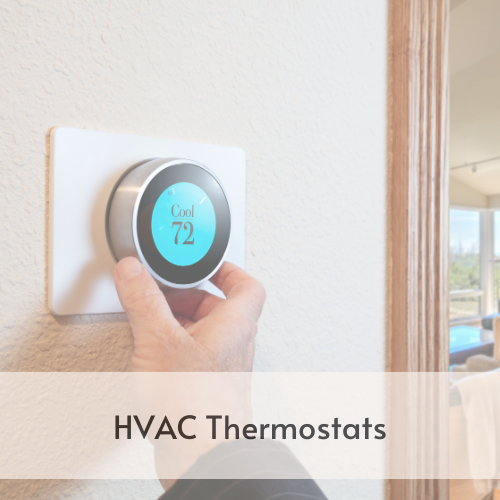
Smart Thermostats:
- The Future of Home Comfort: These are some of the most advanced thermostats, offering Wi-Fi connectivity, remote control via smartphone, and integration with smart home systems like Alexa or Google Assistant.
- Pros and Cons: They offer convenient remote control, energy-saving features, and compatibility with other smart home devices, but as you’d expect, come with higher upfront cost, potential complexity in setup, and may require additional wiring.

Understanding Your HVAC System & Thermostat Wiring
Before choosing a thermostat, it’s crucial to understand both your HVAC system type and the wiring it requires. Different systems use different wires, and knowing what each wire does will help you choose the right thermostat and install it correctly.
Common Thermostat Wires and What They Do
- R (Red Wire): Power supply for the thermostat. It may be labeled Rh (for heating) or Rc (for cooling) depending on your system.
- W (White Wire): Controls the heating system.
- Y (Yellow Wire): Controls the cooling system.
- G (Green Wire): Controls the fan.
- C (Blue/Black Wire, Common Wire): Provides continuous power, essential for most smart thermostats.
- O/B Wire: Used in heat pump systems to switch between heating and cooling.
- Aux/E Wire: Provides auxiliary or emergency heat in heat pump systems.
Why Understanding Wiring Matters: Knowing your wiring setup is essential when upgrading to a new thermostat, particularly if you’re moving from a basic model to a smart thermostat. Many smart thermostats require a C wire for continuous power. If your system lacks a C wire, an adapter like a Power Extender Kit (PEK) or a C wire adapter can be used to provide the necessary power.
Using Adapters like PEKs for Smart Thermostats
Upgrading from a Basic to a Smart Thermostat: If you’re upgrading to a smart thermostat and discover that your current setup lacks a C wire, you don’t necessarily need to run new wiring through your walls. Many smart thermostats come with an adapter, such as a Power Extender Kit (PEK) or a C wire adapter, that allows for continuous power without additional wiring.
How Adapters Work:
- Purpose: These adapters connect to both your thermostat and your HVAC control board, allowing you to use your existing wires to power the new thermostat.
- Installation: The installation process generally involves connecting the adapter to the existing wires at your HVAC control board and then wiring it back to the thermostat. The process varies by model, so refer to the specific instructions provided with your thermostat. Many manufacturers offer step-by-step guidance through their phone apps, making the process easier and more intuitive.
- Consult the Manual: Always refer to your thermostat’s manual or app for detailed installation steps. These guides are tailored to your specific model and provide visual aids, wiring diagrams, and even video tutorials to assist you.
Safety First! Before attempting any thermostat installation or wiring modifications, always turn off the power to your HVAC system to prevent electrical shock or damage. If you feel uncertain or find the process too complicated, there’s no shame in calling a professional. Your safety and the proper functioning of your HVAC system are the top priorities.
When to Call a Professional
While many homeowners can handle installing a new thermostat or using an adapter like a PEK themselves, there are situations where calling a professional is a good idea:
- Complex Wiring: If your HVAC system has a more complex setup (e.g., multi-zone systems, heat pumps), or if the wiring isn’t clearly labeled, a professional can ensure a safe and correct installation.
- Comfort Level: If you are not comfortable working with electrical wiring or modifying HVAC controls, it’s best to hire a professional to avoid potential mistakes.
- Avoiding Warranty Issues: Some thermostat warranties may require professional installation to remain valid. Be sure to check the warranty details of your thermostat model.
Understanding your HVAC system and wiring setup will help you select the right thermostat:
- 2-Wire Systems: Best for mechanical or basic digital thermostats; modifications needed for smart thermostats.
- 3-Wire Systems: Compatible with digital programmable thermostats; consider adding a C wire if upgrading to a smart thermostat.
- 4-Wire Systems: Suitable for a wide range of thermostats, from basic programmable to smart.
- 5-Wire Systems: Fully compatible with all types, especially smart thermostats.
- Multi-Zone Systems: Require advanced programmable or smart thermostats that can manage multiple zones.
To explore some of the best thermostats available for each category, check out our product recommendations page where we list our top picks to help you find the right fit for your home.
Installation and Troubleshooting Tips
While it’s crucial to consult the instructions that come with your thermostat (often provided through a detailed manual or phone app), here are some general installation tips and common troubleshooting advice to help you get started.
General Installation Tips
- Turn Off the Power: Always turn off the power to your HVAC system before starting any work. This ensures safety and prevents electrical shocks or damage to your system. Many people don’t consider the system damage that can occur if they accidentally cross wires!
- Remove the Old Thermostat: Carefully remove your old thermostat from the wall. Take a picture of the existing wiring setup before disconnecting any wires. This will serve as a reference for connecting your new thermostat.
- Label the Wires: As you disconnect the wires from your old thermostat, label them according to the terminals they were connected to. Most new thermostats come with labels to help you with this step.
- Install the New Thermostat Base: Attach the new thermostat base to the wall using the provided screws. Make sure it is level to avoid any issues with the temperature sensor.
- Connect the Wires: Using your reference photo and the labels, connect the wires to the corresponding terminals on your new thermostat. If using a Power Extender Kit (PEK) or C wire adapter, follow the specific steps provided in the thermostat’s manual or app.
- Attach the Thermostat Display: Once the wires are securely connected, snap the thermostat display onto the base.
- Restore Power and Configure Settings: Turn the power back on and follow the setup instructions provided with your new thermostat. Many smart thermostats have apps that guide you step-by-step through the configuration process, ensuring that everything is set up correctly.
Troubleshooting Common Issues
- Thermostat Not Powering On:
- Check the Power Source: Make sure the circuit breaker or switch for your HVAC system is turned on.
- Verify Wiring: Double-check that all wires are securely connected to the correct terminals.
- C Wire Issues: If using a smart thermostat, ensure the C wire or adapter is properly installed to provide continuous power.
- HVAC System Not Responding to Thermostat:
- Wiring Issues: Confirm that the wires are correctly connected and secure.
- Compatibility Problems: Ensure that your thermostat is compatible with your HVAC system. Incompatible thermostats might not function properly.
- Settings Configuration: Verify that the thermostat settings match your system type (e.g., heat pump, multi-stage).
- Inaccurate Temperature Readings:
- Placement Matters: Ensure your thermostat is installed away from drafts, direct sunlight, or other heat sources that could affect its readings.
- Calibration: Some thermostats allow for calibration. Check the user manual for instructions on how to adjust the temperature readings.
- Wi-Fi or Smart Features Not Working:
- Check the Connection: Ensure your thermostat is within range of your Wi-Fi router and that the network connection is stable.
- App Issues: Make sure the thermostat’s app is updated and compatible with your smartphone. Restarting your router may help resolve connectivity issues.
Remember: While these tips can help you with a general installation and setup, always refer to the specific instructions provided by your thermostat’s manufacturer. If at any point you feel uncertain or encounter a problem you’re not comfortable handling, there’s no shame in calling a professional. Ensuring your thermostat is installed safely and correctly is the most important thing.
Final Thoughts
Selecting and installing the right thermostat involves understanding both your HVAC system and its wiring requirements. If you’re considering upgrading to a smart thermostat, make sure to check if a C wire or adapter like a PEK is needed. Always refer to the manufacturer’s instructions or app for accurate installation guidance, and don’t hesitate to call a professional if needed. Remember, safety comes first, and it’s perfectly okay to get help if you feel you’ve gotten in over your head.
For thermostat recommendations and to see our top picks, visit our product recommendations page. Be sure to watch our blog for more content on home improvement, energy efficiency, and smart home solutions—new articles are posted regularly to help you stay informed.
And for more home-related tips straight to your inbox, sign up for our weekly newsletter!
Disclosure: As an Amazon Associate, I earn from qualifying purchases.


